Technician guide: Driver-Facing AI Dashcam using Reveal Hardware Installer app
This guide describes how to install the Driver-Facing AI Dashcam. Download the Reveal Hardware Installer app and follow the installation instructions.
- Check what's in the box
- Get your vehicle ready
- Download the app and log in
- Find the work ticket
- Identify the new camera
- Select the task
- Identify the vehicle
- Step 1. Remove the side panel
- Step 2. Plug in the driver-facing camera
- Step 3. Turn on the camera
- Step 4. Adjust the driver-facing camera
- Step 5. Lock the camera
- Step 6. Store the privacy cover
- Step 7. Assign the camera
Before you begin
Check what's in the box

- 1. Driver-facing camera (x1)
- 2. Privacy sticker (x1)
- 3. Quick guide for drivers (x1)
- 4. T6 star-headed screwdriver (x1)
- 5. Privacy cover (x1)
- Quick start guide (x1)
Get your vehicle ready
Make sure that:
- The vehicle has a Road-Facing AI Dashcam installed.
- The vehicle is in an area with good network coverage.
- You turn off your ignition.
Download the app and log in
To install the camera, you must use the Integrated Video app or Reveal Hardware Installer app (for Verizon Connect Installation Partners only).
- Download the Reveal Hardware Installer app:


Not sure what app to use? - Log in to the app with your Verizon Connect credentials.
If you do not have login credentials, contact your administrator.
Find the work ticket
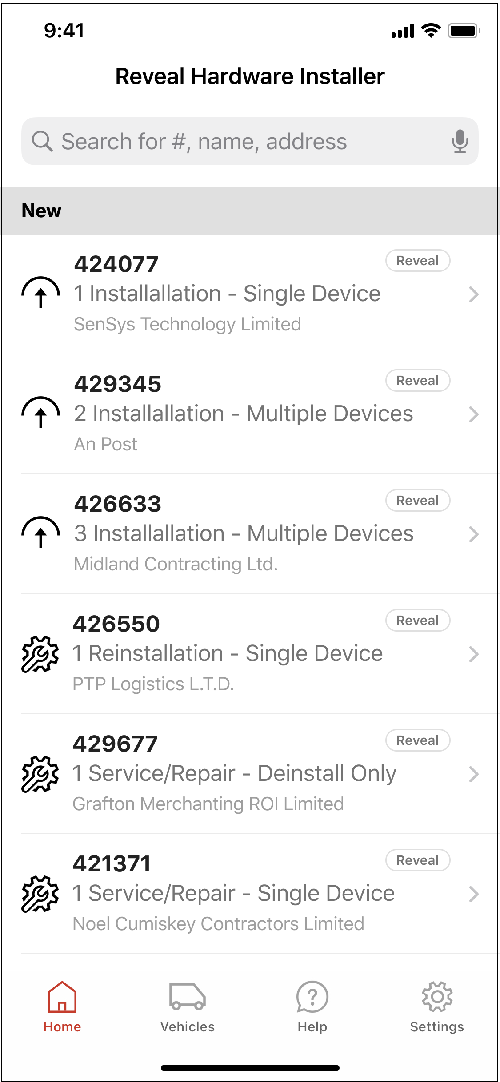
Search for the work ticket in the list.
Identify the new camera
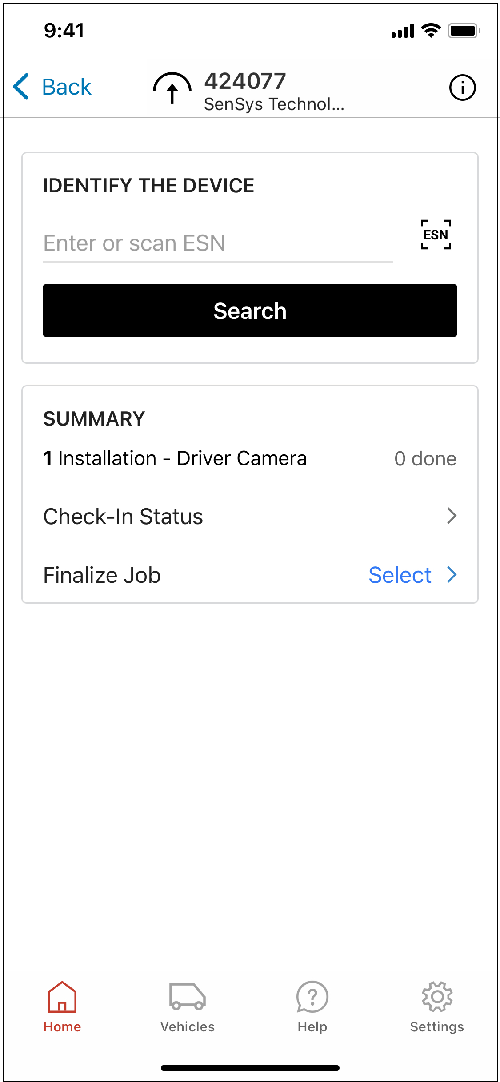
The camera has a unique electronic serial number (ESN) and barcode that can be found on the camera and on the box.
- Type the camera's ESN, or
- Tap SCAN and hold the camera so that the barcode appears in the app’s viewfinder. The app automatically identifies the serial number and loads the next step.
Select the task
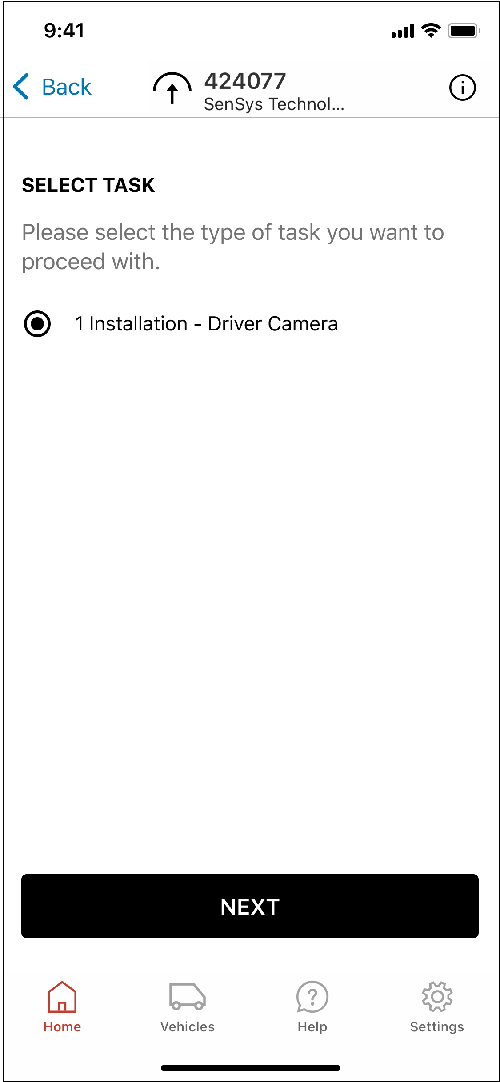
Select 1 Installation - Driver Camera and tap Next.
Identify the vehicle
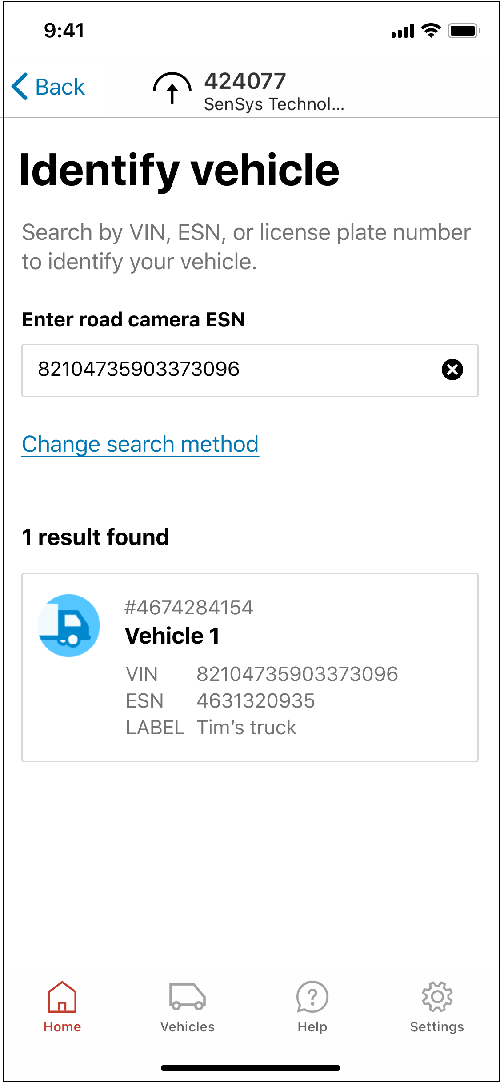
The camera must be assigned to a vehicle so that when the camera detects a harsh driving incident, it can be associated with a particular vehicle.
- Type in the vehicle identification number (VIN), or
- Tap SCAN and hold the camera so that the barcode appears in the app’s viewfinder. The app automatically identifies the serial number and loads the next step.
- To search by the vehicle’s ESN or license plate number, tap Change search method.
- In the search results, tap the correct vehicle and start the installation.
Install the camera
Step 1. Remove the side panel

- Keep the road-facing camera mounted to the windshield.
- Unscrew and unclip the right-hand side panel.
- The two captive screws will remain connected to the panel.
- In the app, tap Next.
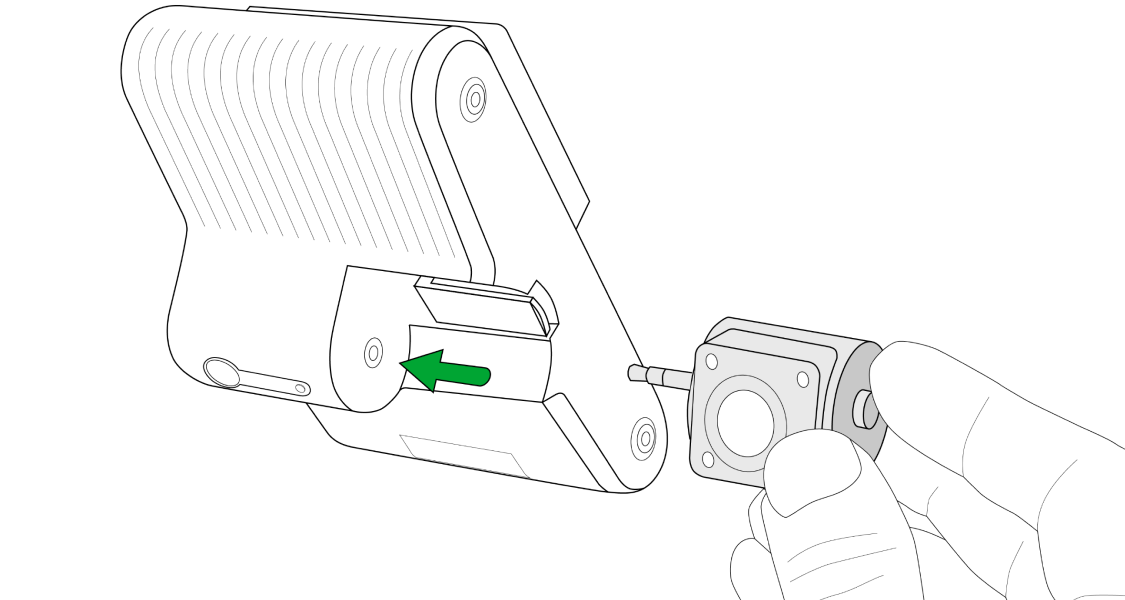
Step 2. Plug in the driver-facing camera

- Hold down the plastic tab and slide the placeholder part out.
- Slide the driver camera into place until it clicks.
- Remove the protective tab from the camera lens.
- In the app, tap Next.
Step 3. Turn on the camera
- Turn on the ignition.
- Wait up to 5 minutes for the vehicle’s road-facing camera to boot up. The red, blue, and green lights will flash in sequence.
- You will hear an audio prompt which indicates your camera is plugged in correctly and receiving power. If the blue and green lights are not solid after 5 minutes, troubleshoot the camera indicator lights.
In some vehicles, the camera may boot up before the ignition is turned on. - In the app, tap Next.
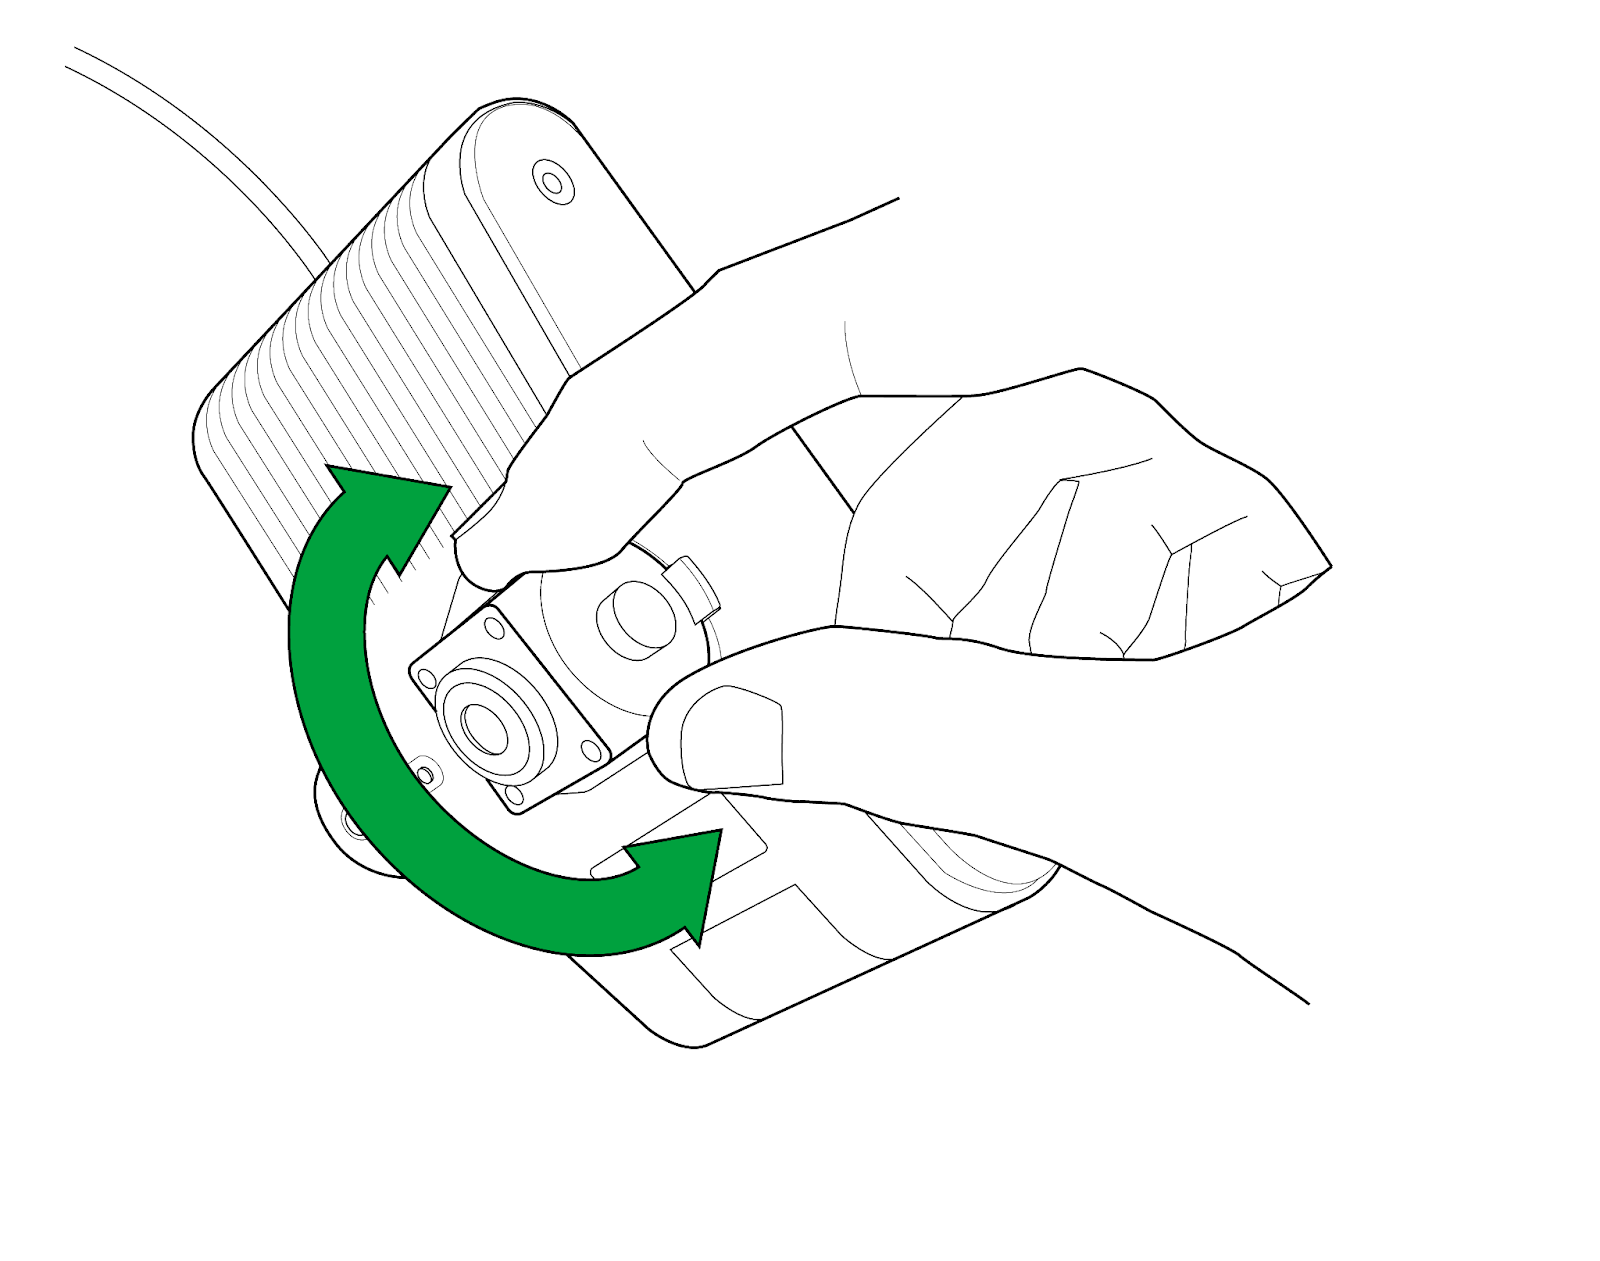
Step 4. Adjust the driver-facing camera
- Sit in the driver’s seat.
- Pull down both sun visors.
- In step 4 of the app, you will see a preview image. Get your head and passenger headrest in the top half of the preview.
- If the preview is obstructed, reposition the mounting bracket.
- To adjust the driver-facing camera angle, rotate the mounting lens up and down.
- In the app, tap Next.
Step 5. Lock the camera

- Replace the side panel.
- Lock by tightening the two screws using the screwdriver provided.
- In the app, tap Next.
Step 6. Store the privacy cover
- Find the drawstring bag which was supplied with the Road-Facing AI Dashcam. The bag should be located in the vehicle, somewhere within the driver’s reach. It may be in the vehicle's cup holder or driver-side door panel.
- Keep the following items in the drawstring bag, somewhere within the driver’s reach:
- Privacy covers
- Quick guide for drivers.
- Make sure there’s a privacy sticker on the driver’s door window. Scan the QR code to read a drivers guide to dashcams and Integrated Video.
- In the app, tap Next.
Step 7. Assign the camera
- Before completing the installation, check a final preview of both cameras and adjust the camera angles if required. An accurate angle allows each camera to operate correctly.
- When previewing the road-facing camera, make sure that the vehicle is parked on a flat surface with at least 25 yards/23 metres of clear space ahead. This allows for accurate calibration and estimation of the horizon.
- In the app, tap Next.
Complete the installation
If you are installing a device or camera in another vehicle, tap Add another device on the Congratulations screen. If not, tap Finish.
Tidy away
- Make sure a company representative has access to any spare parts and tools, so the camera can be adjusted in future.
- Keep the placeholder part you removed from the camera.