CP2 Road-facing camera
This is a printed page that might be out of date. To read the most up-to-date help content, visit https://device-help.verizonconnect.com.
This article explains how to install a CP2 Road-facing camera using the Reveal Hardware Installer app.
- Navigate to the Work Ticket for the Install.
- Select Scan to scan the barcode on the Road-Facing Camera.
You can also manually search for the camera by entering the Serial Number (ESN) into the search bar and tapping Search.
- Select Installation - Road Facing or Dual Camera.
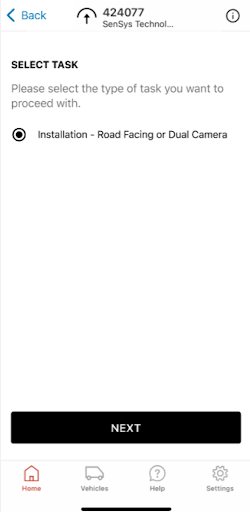
- Tap Next.
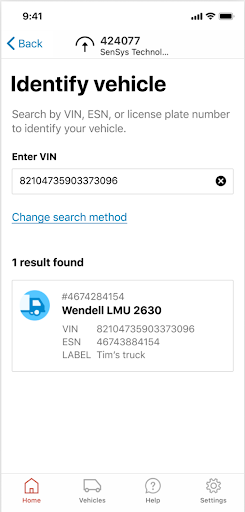
- Pair the camera with a device by entering/entering the VIN, or the license plate, or the device ESN (for VTU), or IMEI (for VDD).
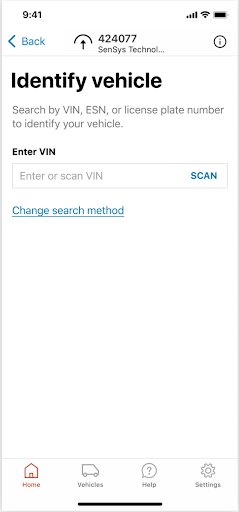
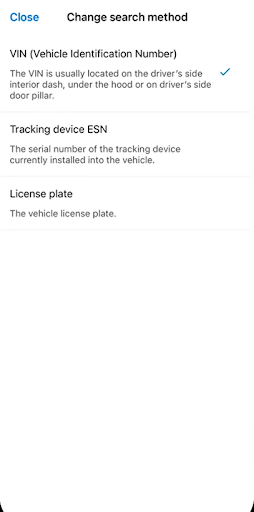
- Toggle between search options by selecting Change search method.
- Tap on the result once the correct vehicle has been found.
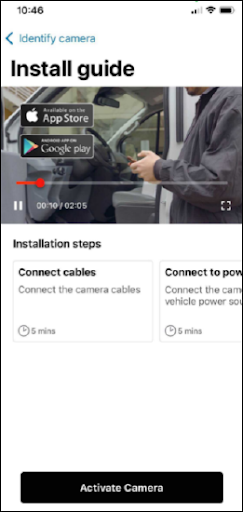
- The next screen displays the install guide video and an overview of the Installation steps. When ready, tap Activate Camera.
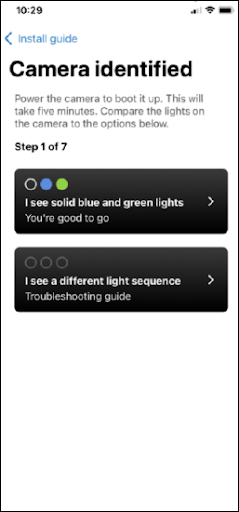
- Power the camera to boot it up (this will take 5 minutes). Look at the lights on the camera and select either: I see solid blue and green lights OR I see a different light sequence.
- Choose the best placement for the camera before sticking it on the windshield, but do not attach it yet.
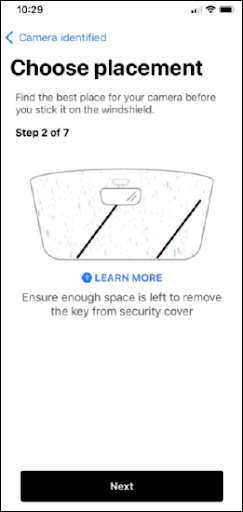
- Tap Next.
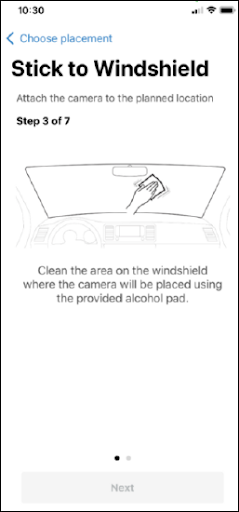
- Clean the windshield using the alcohol wipes provided. Ensure that it is thoroughly dried.
- Attach the camera to the windshield and hold for 30 seconds.
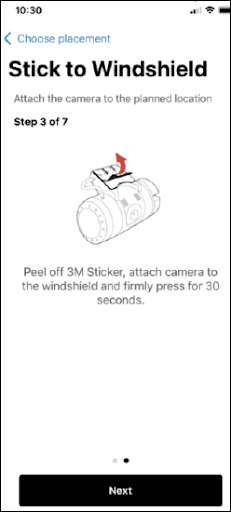
- Once the camera is secure, select Next.
- Align the camera to point directly at the road ahead, and pull the bracket and twist to adjust the camera.
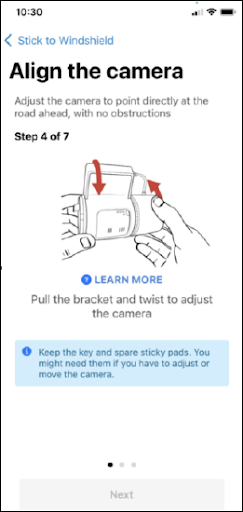
- Continue swiping through the screens, adjusting the alignment as necessary.
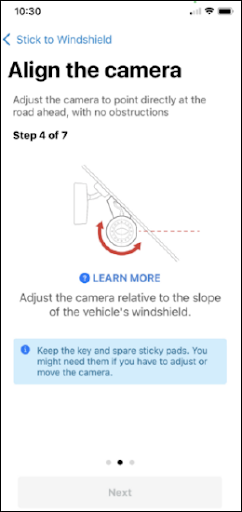
- When ready, tap Next .

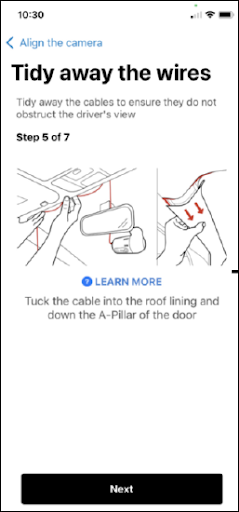
- Tuck the cable into the roof lining and down the A-Pillar of the door and then select Next.
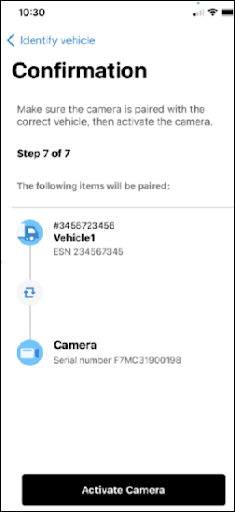
- On the Confirmation screen, make sure the camera is paired with the correct vehicle and press Activate Camera.
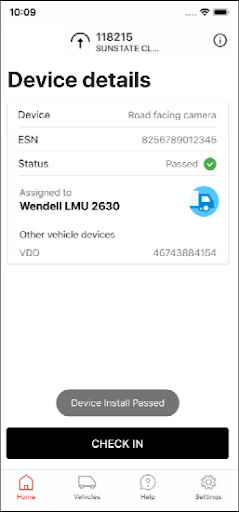
- Review installation details, and select CHECK IN to complete.