Reposition a camera on a windshield
When the camera is mounted in the correct position and the lens is angled accurately, unsafe driving behaviours are detected, and videos are uploaded to the Video List.
In this article
- Check the camera’s position on the windshield
- Reposition the AI Dashcam
- Before you begin
- Step 1. Detach the side panel
- Step 2. Slide the camera off the bracket
- Step 3. Detach the mounting bracket
- Step 4. Clean the windshield
- Step 5. Find a mounting position
- Step 6. Adjust the road-facing camera
- Step 7. Adjust the driver-facing camera
- Step 8. Mount the camera
- Step 9. Lock the road-facing camera
- Step 10. Lock the driver-facing camera
- Reposition the road-facing camera (model 2)
Check the camera’s position on the windshield
If the camera is not mounted within the shaded area, reposition the camera to move the camera bracket to a different spot on the windshield.
Reposition the road-facing camera (model 2).
If the camera is mounted within the shaded area, adjust the camera angles while the camera remains attached to the mounting bracket.
Reposition the AI Dashcam
Before you begin
Gather your tools
You will need the following tools:
- T6 star screwdriver
- A spare sticky pad
- Panel removal tool
- Alcohol wipe
The screwdriver, sticky pads, and alcohol wipes were supplied with the AI Dashcam. To order more supplies, contact Support.
Get your vehicle ready
Turn off the vehicle’s ignition and wait up to 15 minutes for the camera to power off.
Step 1. Detach the side panel
- Unscrew the right-hand side panel. The two captive screws will remain connected to the panel.
- Unclip the panel by pulling firmly on the tab.
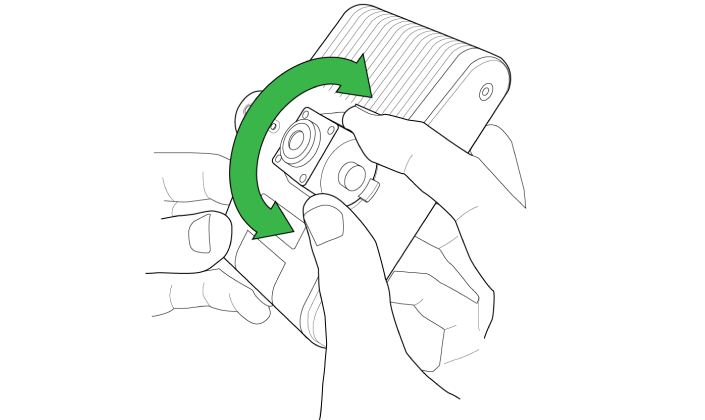
Step 2. Slide the camera off the bracket
Remove the camera from the bracket by sliding it firmly to the left.
Step 3. Detach the mounting bracket
- Wedge the panel removal tool between the mounting bracket and the windshield.
- Apply gentle pressure to create leverage until the mounting bracket detaches.
Step 4. Clean the windshield
Clean the windshield with an alcohol wipe. Remove any excess sticker residue left on the windshield.
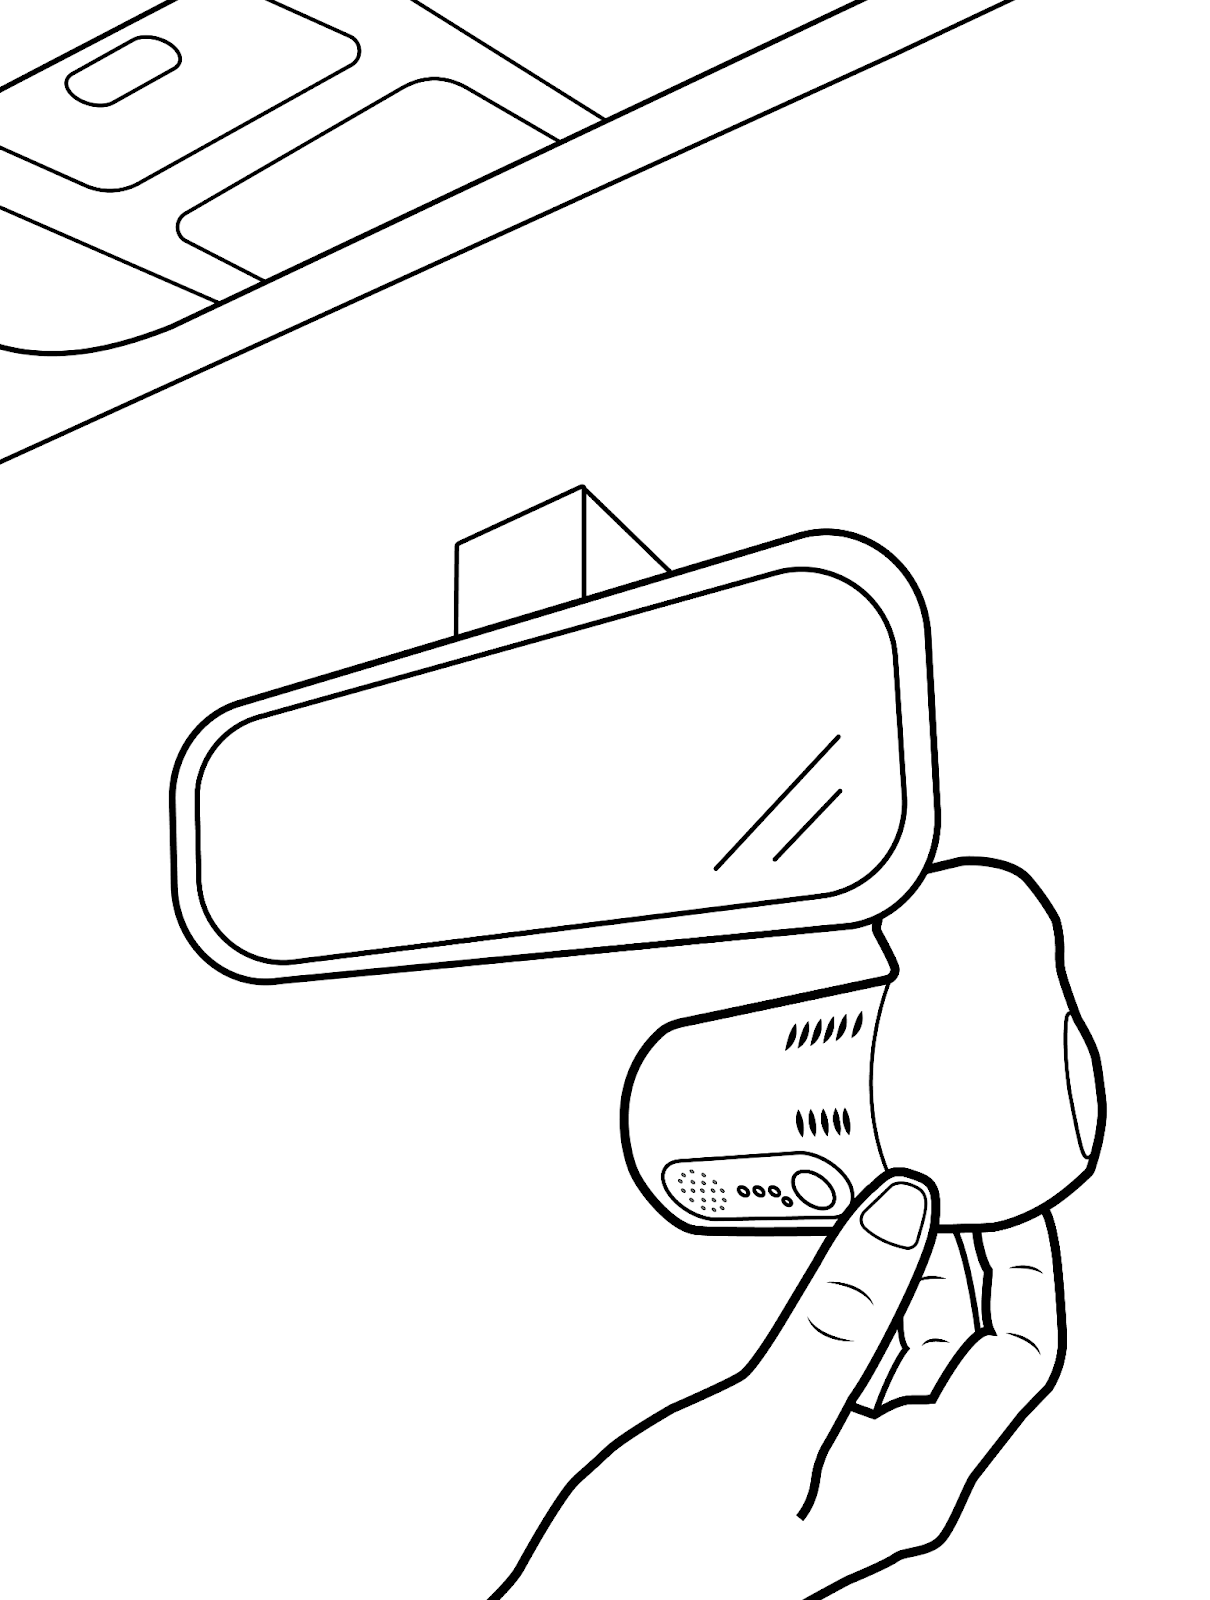
Step 5. Find a mounting position
- Sit in the driver’s seat.
- Pull down both sun visors.
- Hold the camera in the spot you want to mount it, anywhere within the shaded area of the image above.
When choosing a location, consider the following:
- The camera must not obstruct the driver's view of the road ahead.
- Make sure the lenses are not obstructed by the sun visors, rear view mirror, or the windshield shaded sun strip. The sun strip obscures the road-facing camera image and is in the position of the vehicle's climate control system. Excess heat can interfere with the camera’s operation.
Do not stick the camera to the windshield until later.
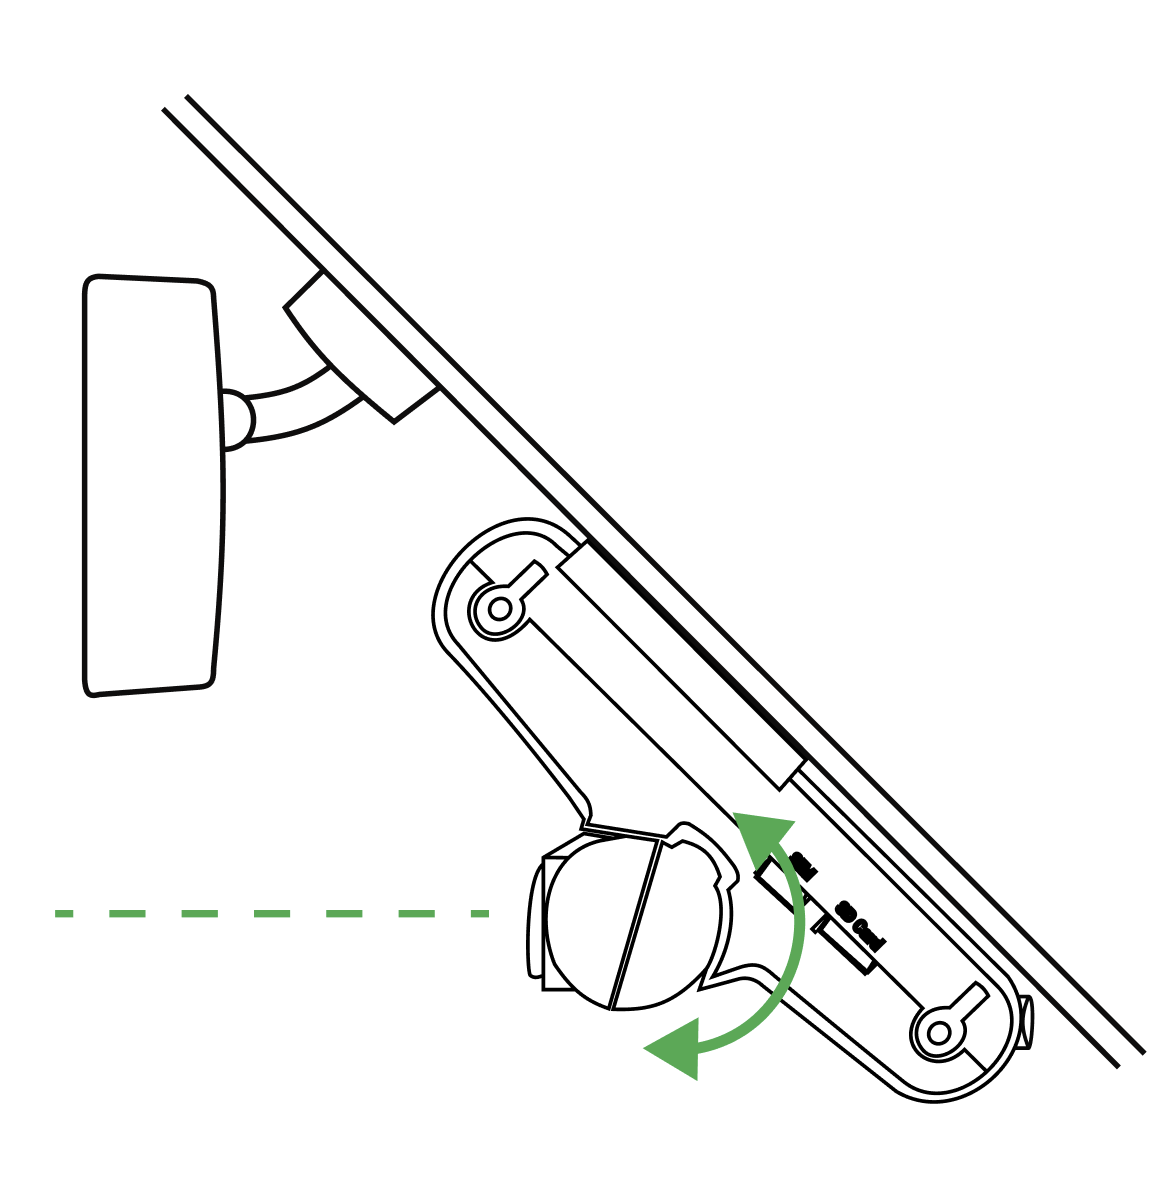
Step 6. Adjust the road-facing camera
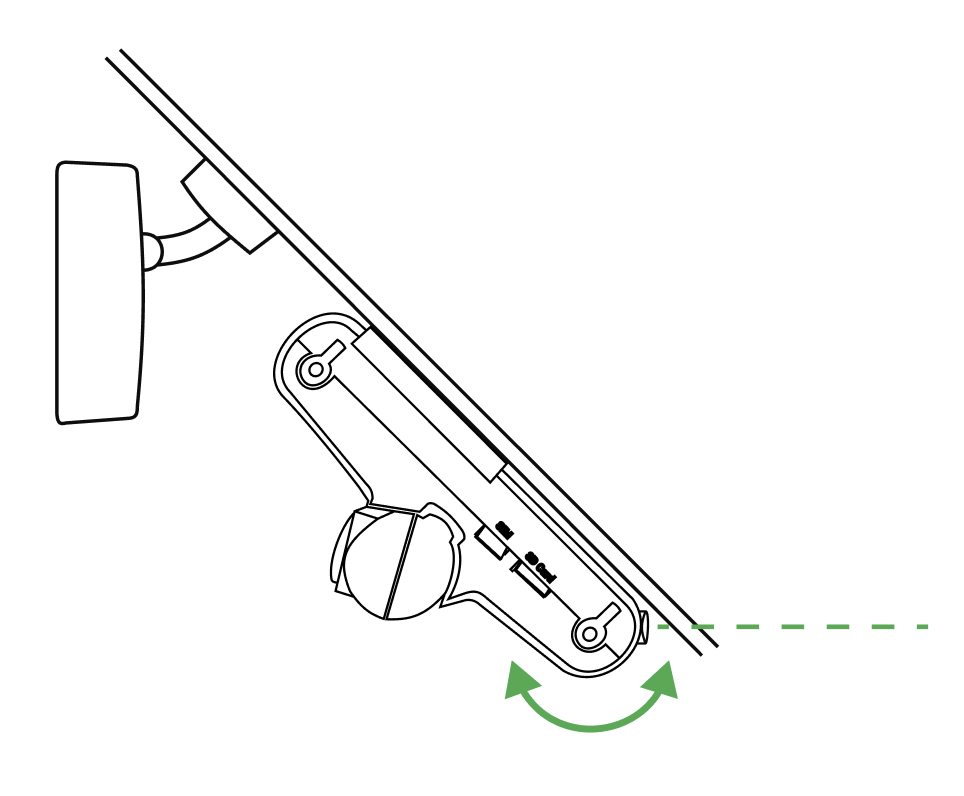
- Hold the camera in the spot you want to mount it.
- Adjust the camera angle so it has a clear view of the road ahead.
- To adjust the camera angle, rotate the mounting lens up and down.
If you have a Road-Facing AI Dashcam, skip to step 8.
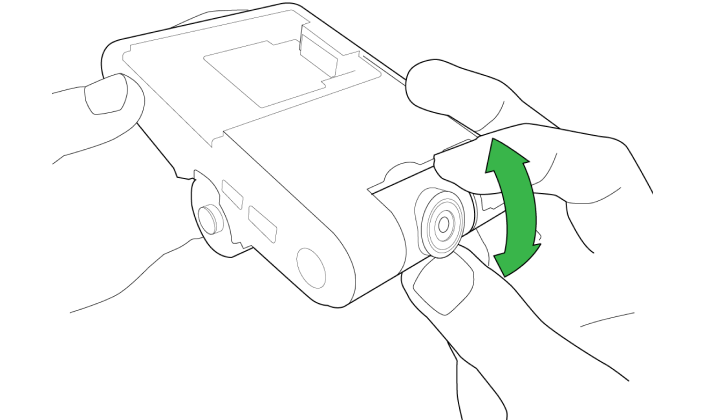
Step 7. Adjust the driver-facing camera
- Hold the camera in the spot you want to mount it.
- Adjust the camera angle so it points towards the centre of the cabin.
- To adjust the camera angle, rotate the mounting lens up and down. The camera has a 120° field of view, so it covers most of the vehicle interior.
Step 8. Mount the camera
- Make sure the windshield temperature is not too hot or cold (recommended between 10°C to 27°C). Otherwise, the mounting pad will not bond correctly to the windshield.
- Remove the protective tabs from both camera lenses.
- Peel off the protective layer from the mounting pad on the camera bracket.
- Stick the bracket to the windshield and press firmly for 30 seconds.
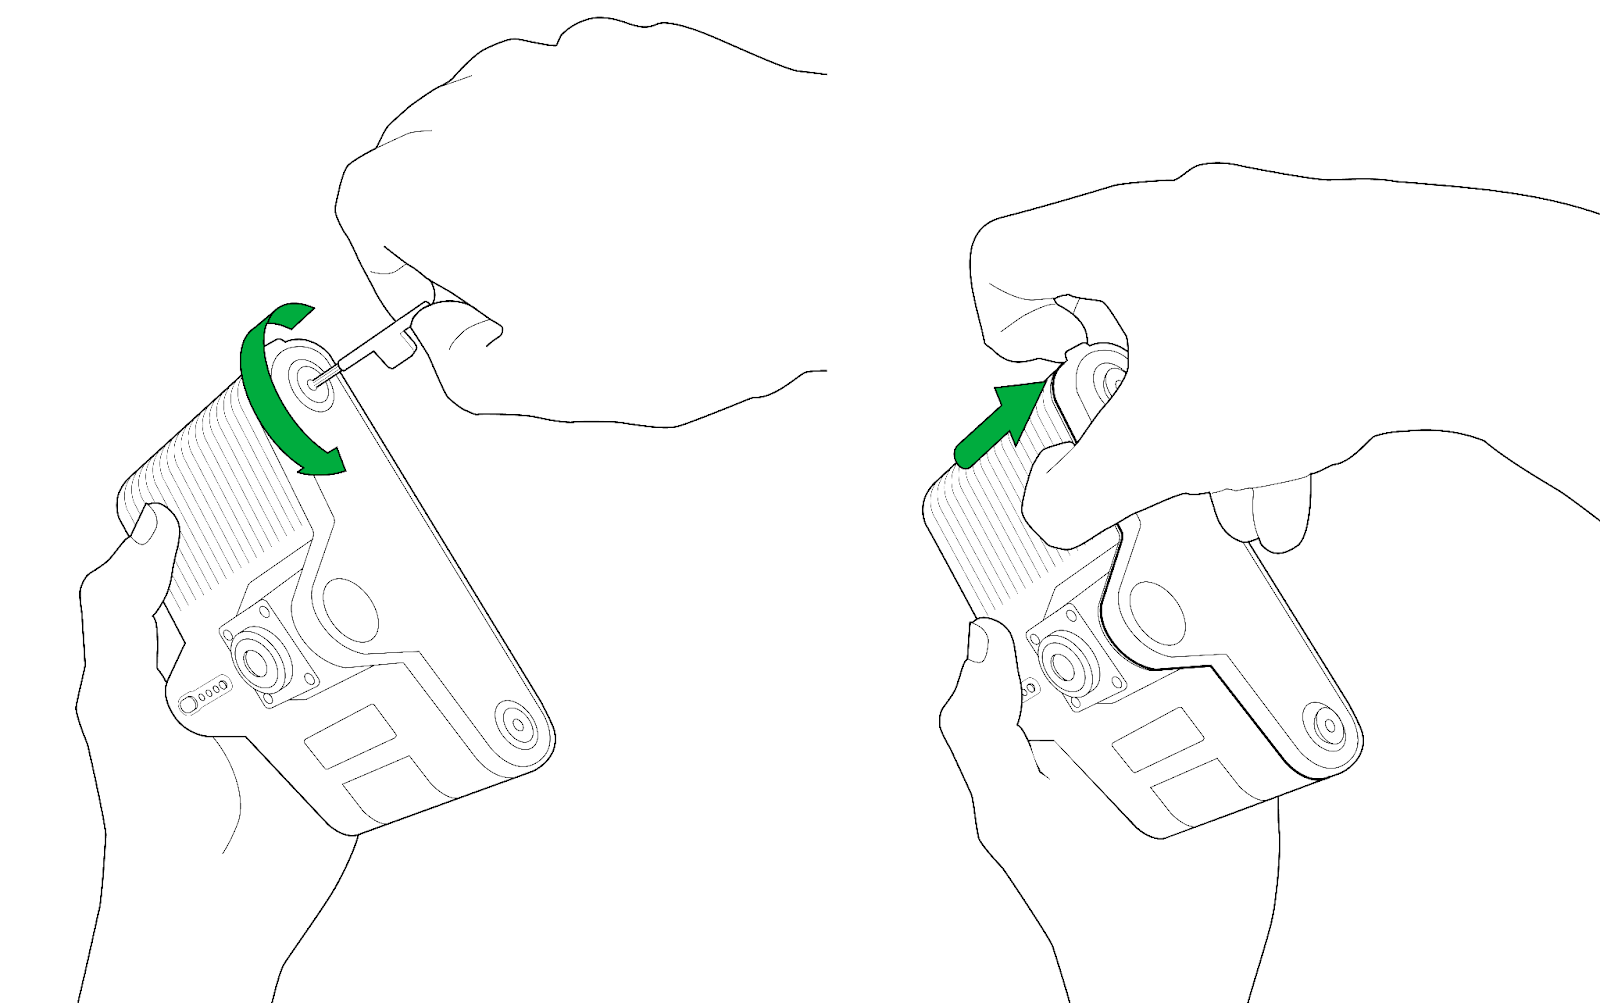
Step 9. Lock the road-facing camera
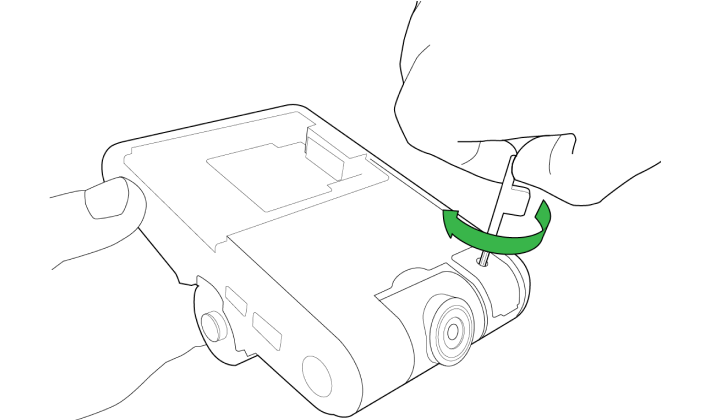
- Remove the camera from the bracket by sliding it firmly to the left.
- Tighten the lock using the screwdriver.
- Slide the camera back onto the bracket until it clicks into place.
If you have a Road-Facing AI Dashcam, the steps are complete.
Step 10. Lock the driver-facing camera

- Replace the side panel.
- Lock by tightening the two screws using the screwdriver.
Reposition the road-facing camera (model 2)
Before you begin
Gather your tools
You will need the following tools:
- A spare sticky pad
- Panel removal tool
- Alcohol wipe
Sticky pads and alcohol wipes were supplied with the AI Dashcam. To order more supplies, contact Support.
Get your vehicle ready
Turn off the vehicle’s ignition and wait up to 15 minutes for the camera to power off.
Step 1. Remove the camera from the windshield
- Wedge the panel removal tool between the mounting bracket and the windshield.
- Apply gentle pressure to create leverage until the mounting bracket detaches.
- Remove any of the sticky pad’s residue left on the windshield. To do this, you can:
- Rub it to cause friction and create heat. The residue will peel off.
- Use an adhesive remover along with a scraper or other tools.
Step 2. Clean the windshield
Clean the windshield with an alcohol wipe. Remove any excess sticker residue left on the windshield.
Step 3. Find a mounting position
- Sit in the driver’s seat.
- Pull down both sun visors.
- Hold the camera in the spot you want to mount it, anywhere within the shaded area of the image above.
When choosing a location, consider the following:
- The camera must not obstruct the driver's view of the road ahead.
- Make sure the lenses are not obstructed by the sun visors, rear view mirror, or the windshield shaded sun strip. The sun strip obscures the road-facing camera image and is in the position of the vehicle's climate control system. Excess heat can interfere with the camera’s operation.
Do not stick the camera to the windshield until later.
Step 4. Attach a new sticky pad

- Attach a new 3M adhesive pad to the camera bracket and press firmly.
- Peel off the protective strip from the adhesive pad.
Step 5. Stick the camera to the windshield
Press the camera firmly to the windshield for 30 seconds. This sets and hardens the bond adhesive, reducing the chance of the camera falling off the windshield.