Repair guide: J1939 backbone connector
Skill level: Basic
This installation requires minimal technical expertise.
This article explains how to repair incorrectly located wires on a J1939 backbone connector.
Time required: 5-10 minutes
Procedure
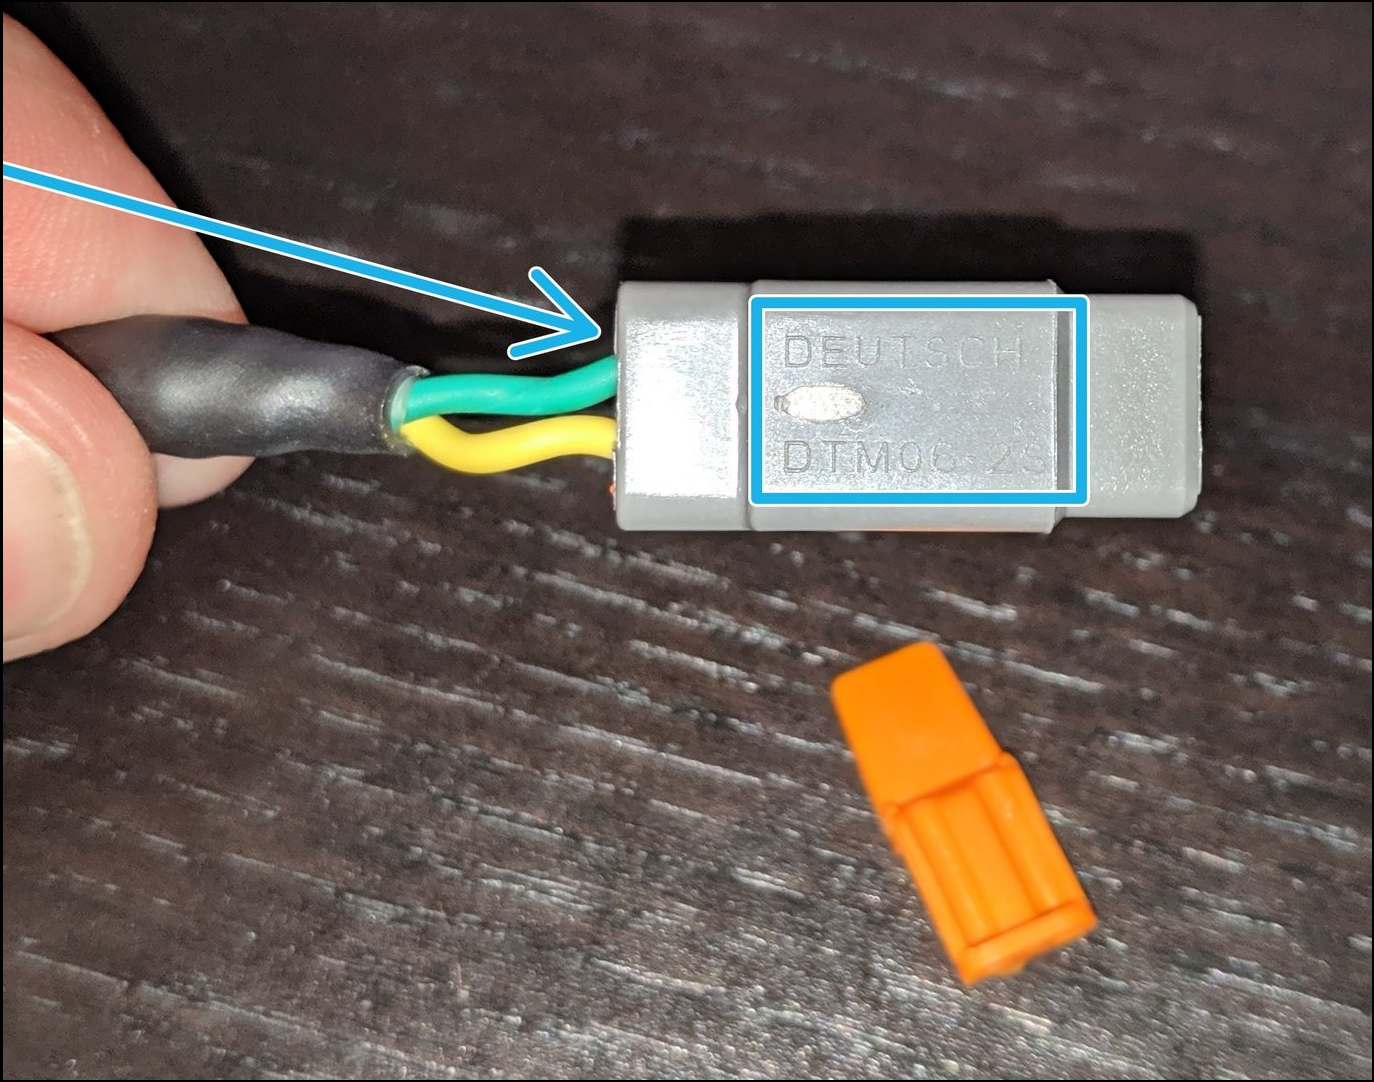
- Confirm the connector requires repair (as shown in either image below).
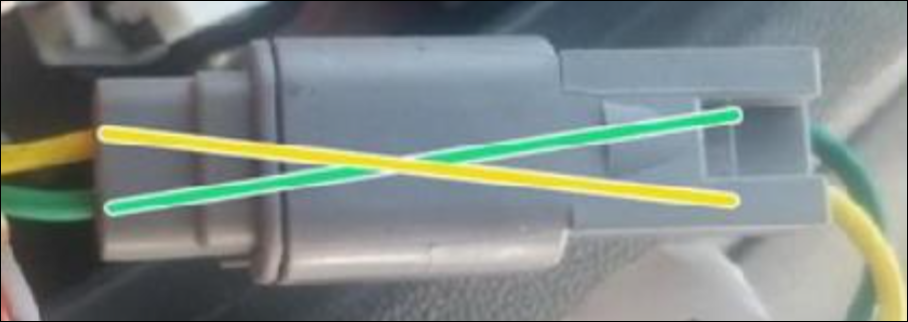
Yellow and green wires are misaligned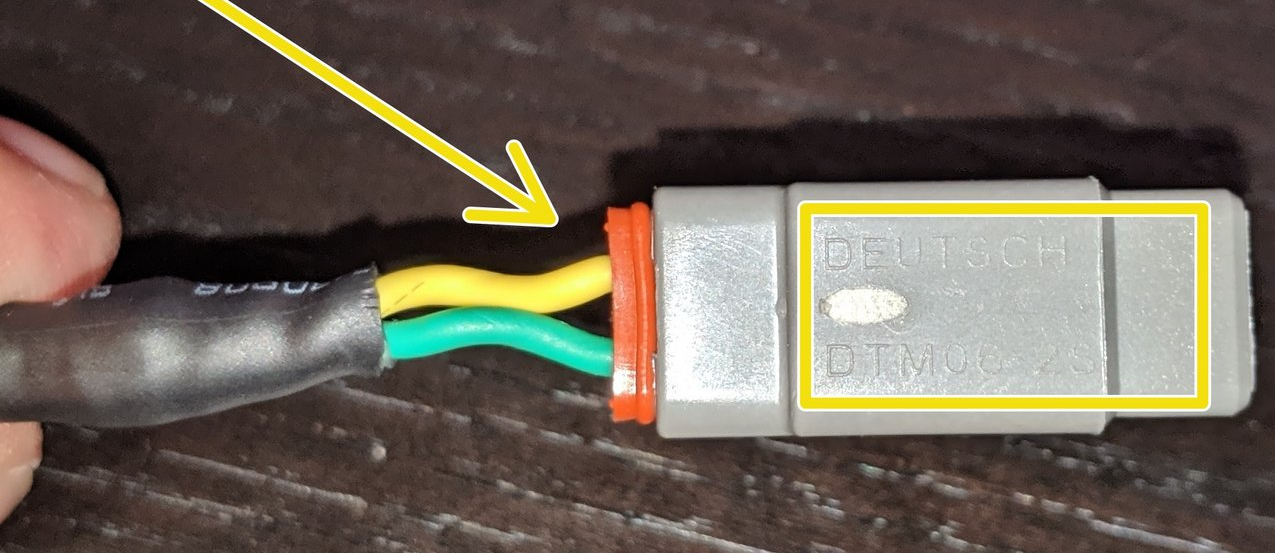
Yellow wire on top when facing part detail - Remove the orange pin lock using a small electronics screwdriver or needle-nose pliers.
Removing the orange pin lock exposes the pin release tabs.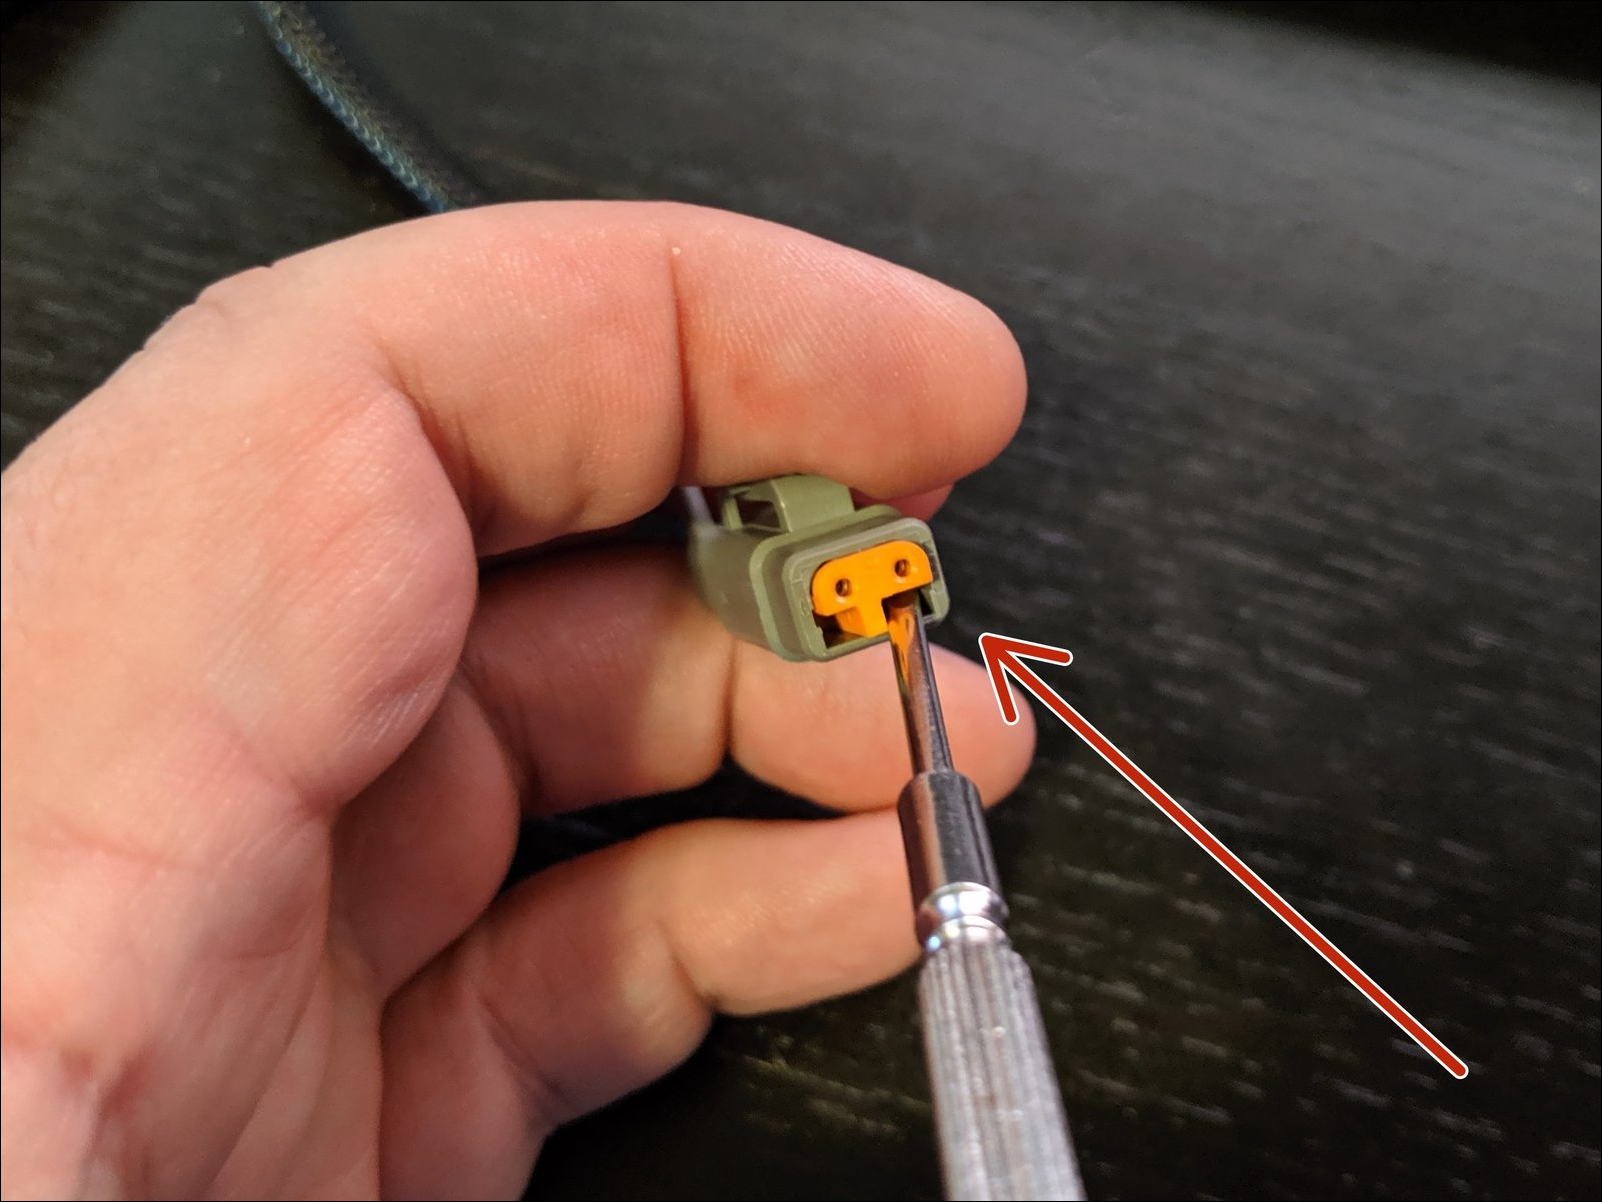
Very little pressure is required to release the pin lock. - Release the pins by pushing the pin release tabs down and away from the pins using a small electronics screwdriver.
The pins may release more easily if, while releasing the pins, you apply a pulling tension (away from the connector) on the wires. - Slide the connector off.

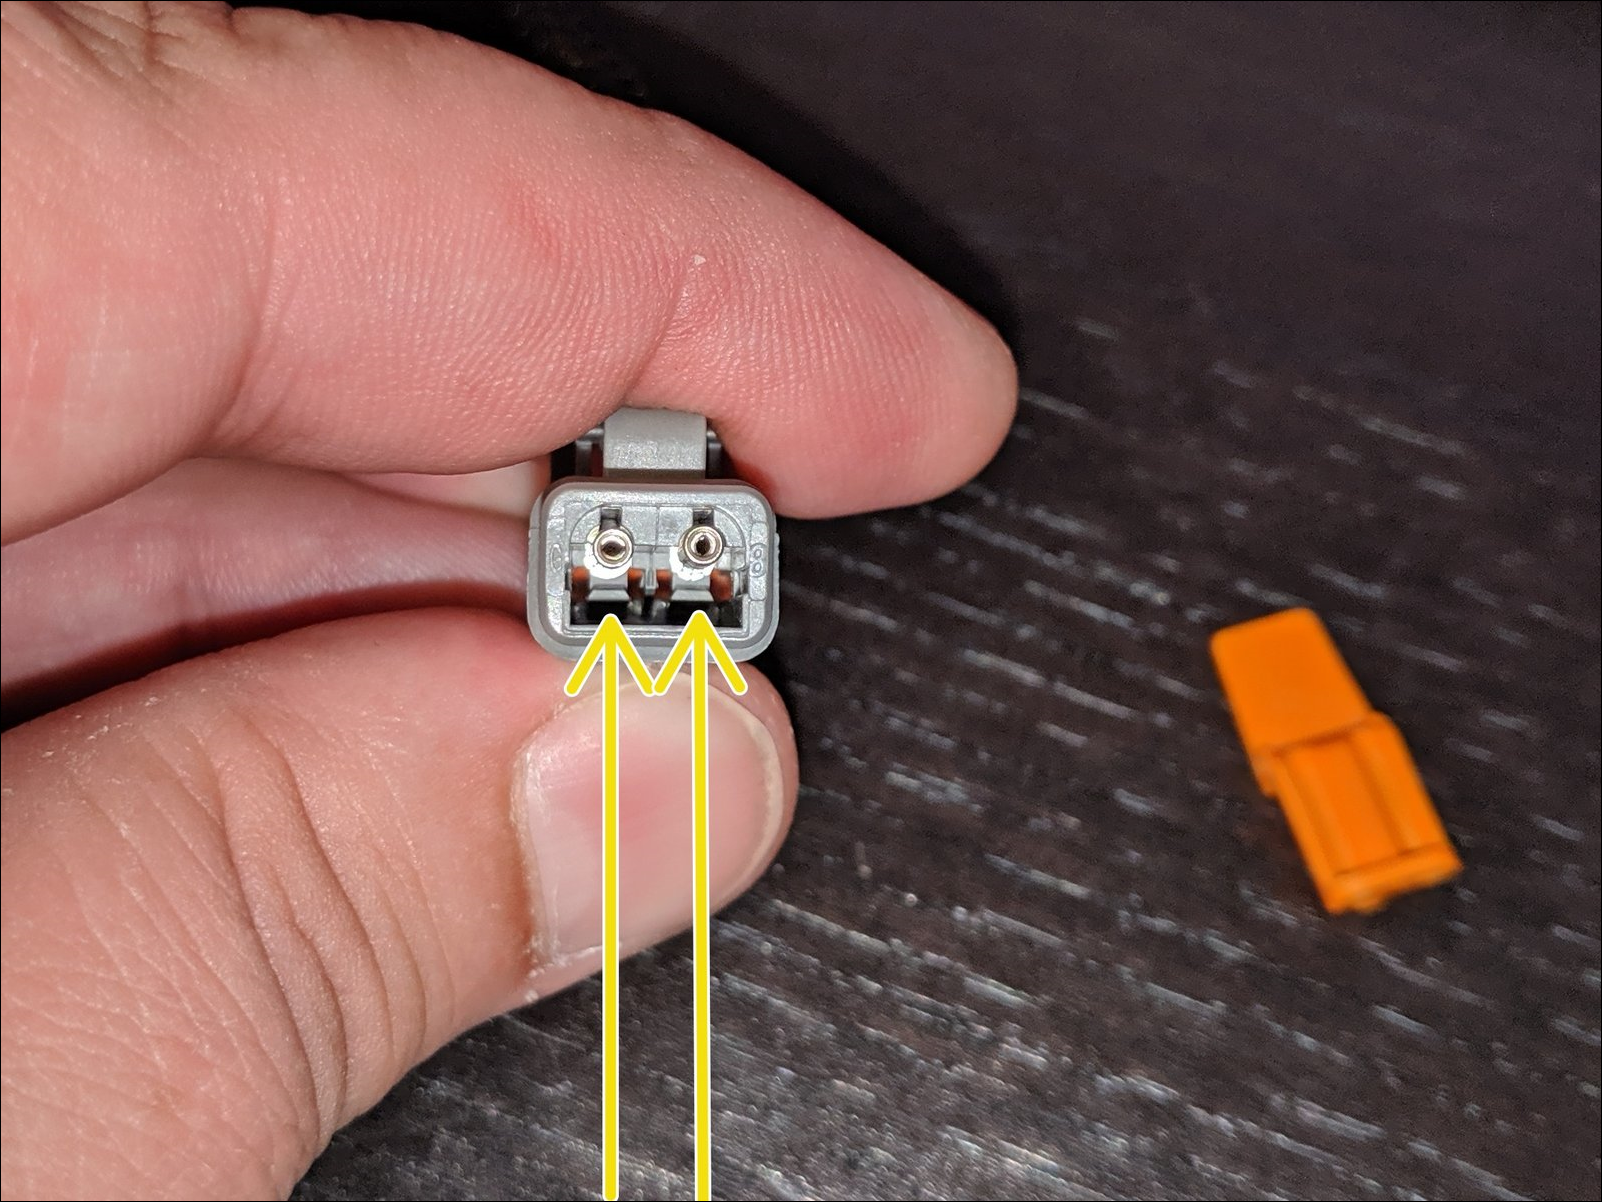
When the pin release tabs are released, the connector should slide off easily. - Flip the connector around and slide it onto the pins. The reseated connector should look like that in the image below. (green wire on top when the part information is facing you.)
- Reinstall the orange pin lock.
- Repeat steps 2 to 6 for the second connector.
- Verify the repair.
The wires should align green to green and yellow to yellow as shown in the images below.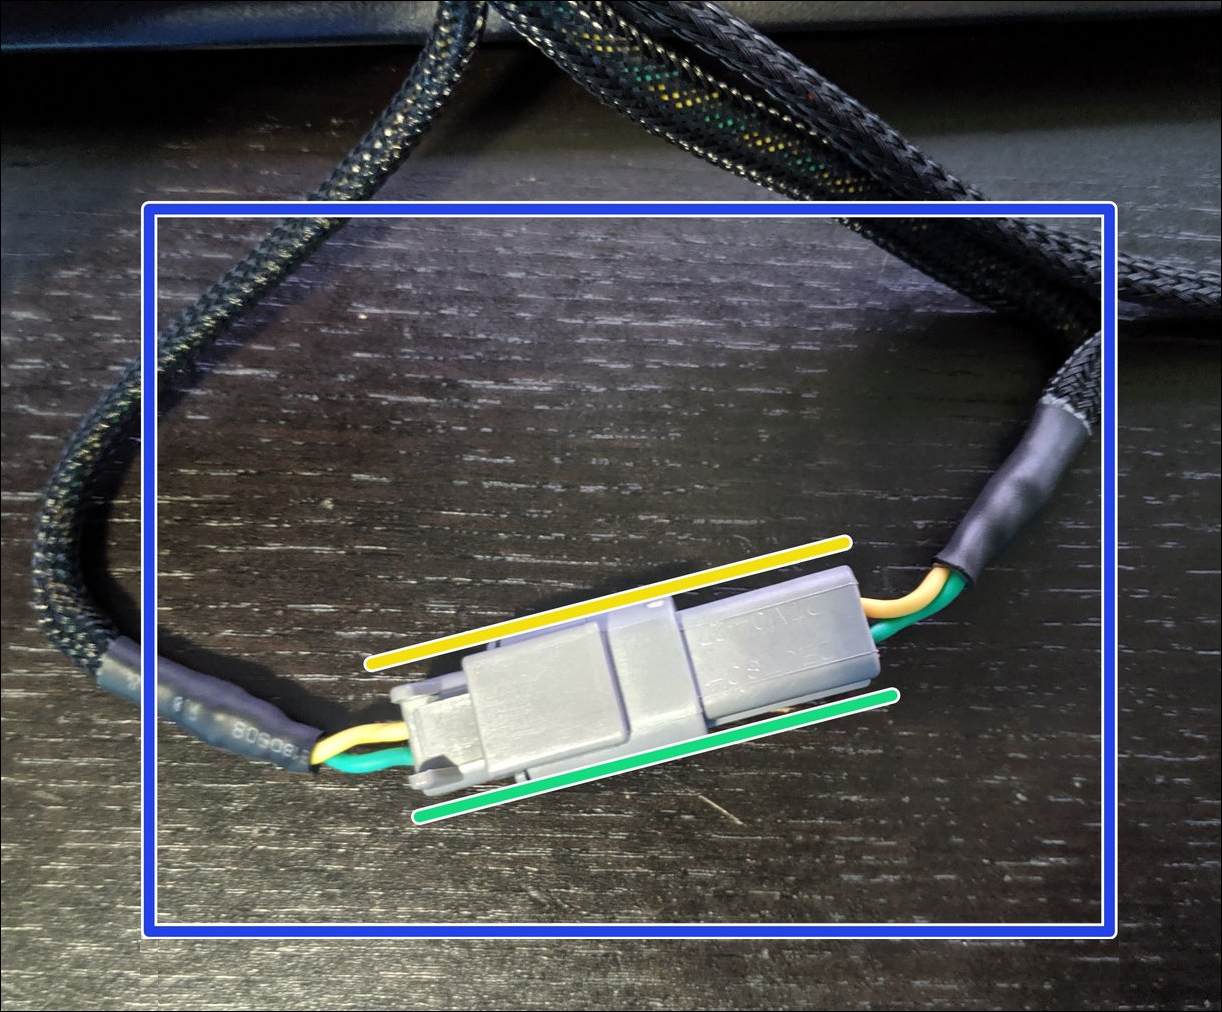
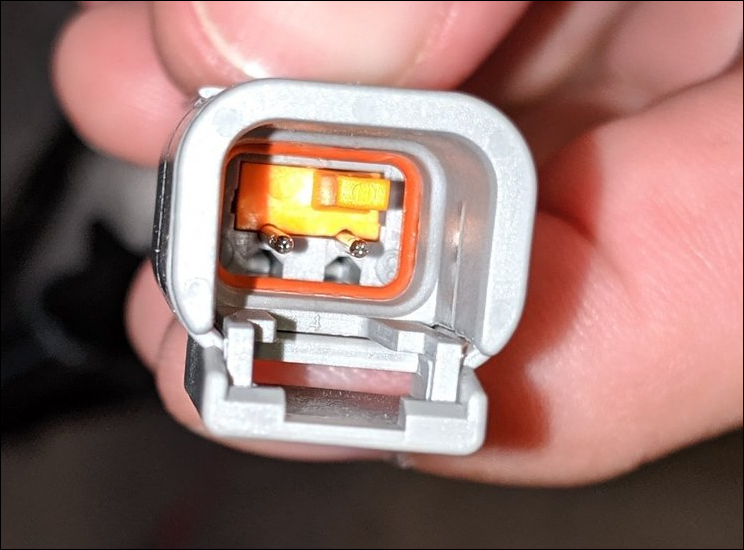
Connector plugged into itself
Connector plugged into truck
Disclaimer
Verizon Connect shall have no liability whatsoever for any damages that arise from, or are connected with, your use of our services, including the GPS tracking hardware and dash cams, in a manner contrary to the(se) instructions or in violation of law and/or our agreement. Tracking hardware connected to the diagnostic port in any vehicle that has third-party devices also connected to the diagnostic port can cause interference or loss of functionality of the third-party device. These third-party devices include, but are not limited to, wheelchair lifts, lifesaving equipment, emergency lighting, and radar guns. If such a conflict exists, contact Verizon Connect support to have the tracking hardware configured to support the third-party device. Failure to do so relieves Verizon Connect of all liability for damages that arise from or are connected with your use of the devices. Installed devices may only be removed and transferred to another vehicle if the second vehicle has been tested for compatibility, as per the(se) instructions. Transfers between vehicles which do not follow the(se) instructions will void any and all warranties from Verizon Connect, and relieve Verizon Connect of all liability for damages that arise from or are connected with your use of the devices.